About Ordops
What is Ordops?
Ordops is an all-in-one business management platform for contractors, tradespeople, and construction companies.
From a single workspace, you can:
- Manage projects and customers
- Plan and schedule work
- Create and assign tasks
- Track working hours
- Register expenses and scan receipts
- Create quotes and invoices
- Monitor business finances
- Find subcontractors or outsource work through the Resource Board
- Manage your team and workload
The Dashboard provides a quick overview of your business, including monthly profit, today's schedule, and items that require attention.
New accounts start with a free trial, allowing you to explore all features before choosing a subscription plan.
Getting started
What are the first things I should do?
Before creating projects, quotes, or invoices, complete your Company Profile in Settings. This ensures that all customer-facing documents and communications contain the correct business information.
We recommend completing:
- Company name
- Company logo
- Chamber of Commerce number
- VAT number
- IBAN / bank account details
- Company address
- Website
- Default VAT percentage
- Quote validity period
You should also review and customize your Quote Terms & Conditions. These terms are automatically included in your quote PDFs and help set clear expectations with customers.
To get the most value from Ordops, we also recommend connecting your work or personal calendar (such as Outlook or Google Calendar). This enables smarter planning, more accurate availability checks, better team scheduling, and helps prevent double bookings. When calendars are connected, Ordops can take existing appointments and commitments into account when planning work.
Once your company profile is complete and your calendar is connected, Ordops can automatically use this information across quotes, invoices, emails, planning, and scheduling, helping you maintain a professional and efficient workflow from day one.
How do I find my way around?
Ordops uses three navigation methods that work together to help you quickly access the features you use most.
Bottom Navigation Bar
On mobile devices, the bottom navigation bar provides one tap access to the most frequently used areas:
- Dashboard
- Planning
- Hours
- Resource Board
- Expenses
Side Menu
Tap the hamburger menu in the top left corner to open the full navigation menu.
From here you can access all modules, including:
- Dashboard
- Projects
- Planning
- Tasks
- Quotes
- Invoices
- Hours
- Expenses
- Resource Board
- Financials
You can also access:
- Team
- Settings
- Help & FAQ
At the bottom of the menu, you will find your trial status, subscription options, and account information.
Quick Create (+) Button
The blue + button in the bottom right corner is the fastest way to create and register information in Ordops.
It opens the Quick Create menu with shortcuts to:
- New Task
- Clock In
- Scan Receipt
- New Quote
- New Invoice
- New Project
Together, the bottom navigation, side menu, and Quick Create button give you fast access to every part of Ordops from anywhere in the app.
Where do I land when I log in?
After logging in, you arrive on the Dashboard.
The Dashboard gives you an instant overview of your business and highlights the most important information for the day, including:
- Profit this month
- Total projects, active tasks, and open quotes
- Recent projects and their status
- An Attention section showing items that require action, such as expiring quotes or unassigned tasks
- Open quotes awaiting follow-up
- Upcoming scheduled tasks
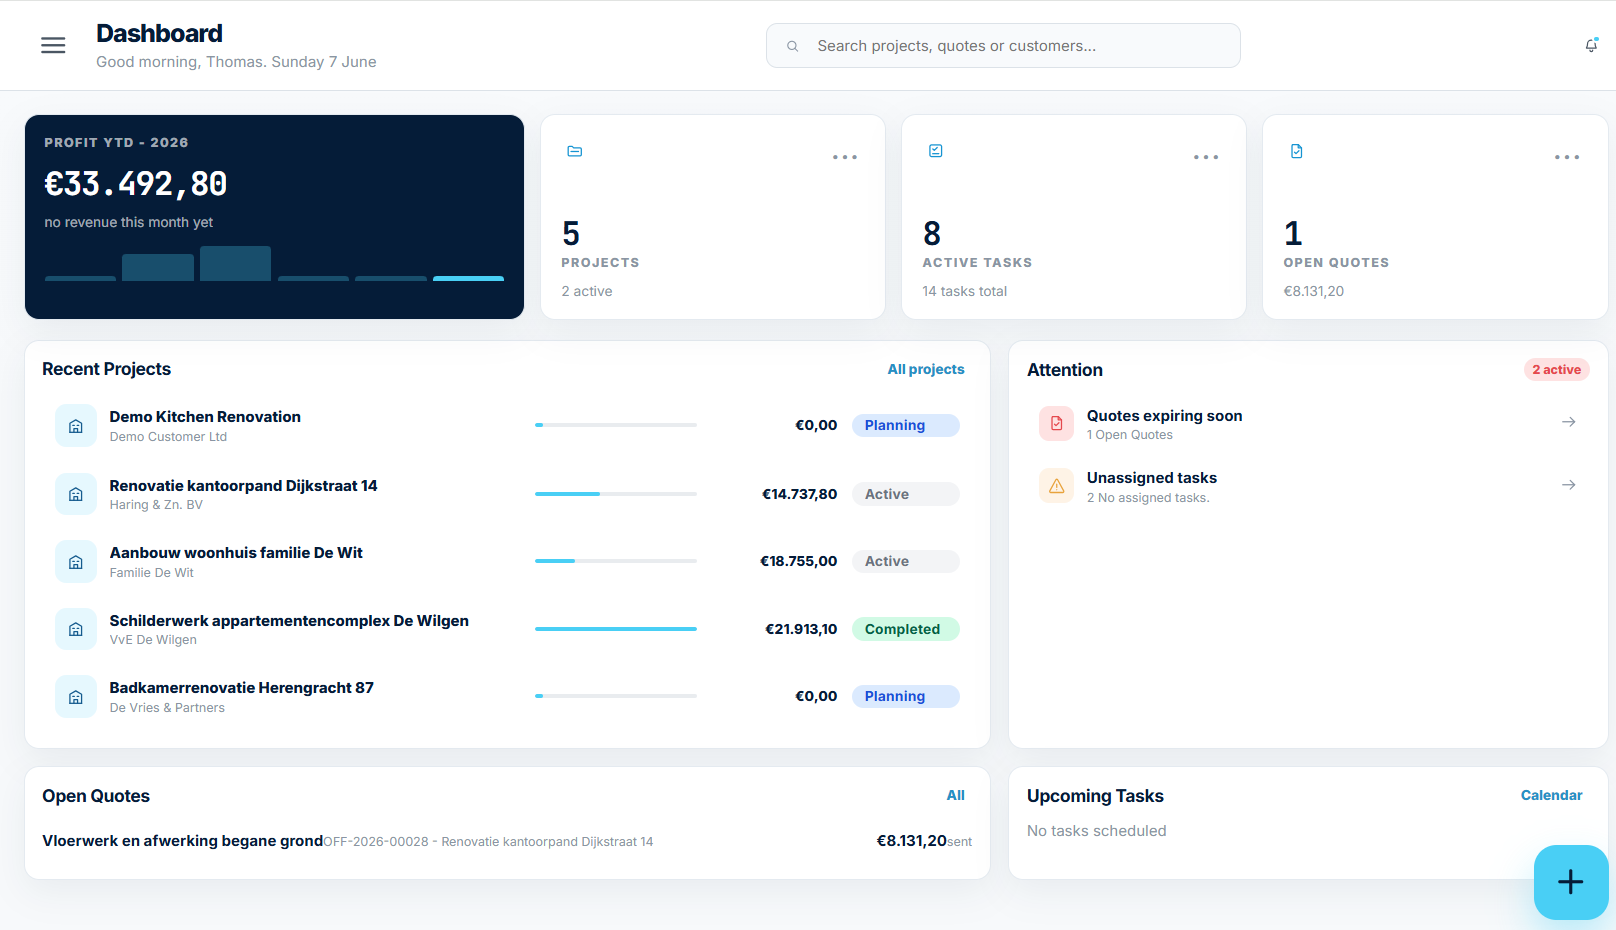
From the Dashboard, you can quickly navigate to your projects, tasks, quotes, invoices, planning, and other key areas of Ordops. It serves as your central workspace and starting point each time you log in.
Address book
Where do I manage people and contacts in Ordops?
Open Address book and create one relationship for a company, household, or individual. Mark it as a customer, supplier, or both, add its contact people, and reuse it in projects, quotes, and invoices.
General
Is there an app available?
Ordops is focused on mobile usage, and the web app offers a similar experience to a native app. You can add the website to your home screen to launch it just like a regular app:
- Android: Open the website in Chrome, tap the three-dot menu in the top right corner, and select "Add to Home screen."
- iOS: Open the website in Safari, tap the Share button at the bottom of the screen, and select "Add to Home Screen."
Can I see quotes, invoices, costs, and files per project?
Yes. A project brings together its quotes, invoices, expenses, receipts, files, hours, and work records. The project estimate is operational; finance and tax figures remain based on actual invoices, payments, and costs.
Invoices & quotes
How do I create an invoice?
There are three ways to create an invoice in Ordops:
Option 1: Use the Quick Create (+) button
- Tap the floating + button.
- Select New Invoice.
- Choose the project.
- If the project has existing quotes, you can create the invoice based on a quote or start from scratch.
- Select whether the invoice is a Partial Invoice or a Final Invoice.
- Review the line items and save or send the invoice.
Option 2: Create an invoice from a project
- Open the project.
- Navigate to the Invoices tab.
- Select New Invoice.
- Choose a quote (if available) or create the invoice manually.
- Complete the invoice and save or send it.
Option 3: Create an invoice from the Invoices module
- Open Invoices.
- Select New Invoice.
- Choose the project.
- Create the invoice from an existing quote or from scratch.
- Select Partial Invoice or Final Invoice and complete the invoice.
All invoices are linked to a project, allowing you to track quotes, invoices, expenses, and profitability in one place.
How do I create a quote?
Use the floating + button and select New Quote. You can create a quote from an existing project or start with a blank quote.
You can also create a quote directly from the Quotes page.
Once a quote is accepted, it can be converted into an invoice.
How do I log an expense or scan a receipt?
Open Expenses and tap Register Expense, or use the quick-capture categories: Equipment, Vehicle, Office, and Insurance.
To photograph a receipt or import an invoice, use the floating + button and select Scan Receipt.
After scanning or importing, review and validate the extracted information before saving. This ensures that supplier details, dates, amounts, and VAT are captured correctly.
Deductible VAT is tracked automatically and applied to your expense records.
Do I have to list every material on a quote, or can I group them?
Small materials may be grouped into clear summary lines; every screw need not be separate. Keep expensive or customer-relevant items separate and review assistant suggestions before sending.
Navigation
How do I navigate the app?
Use the side menu (hamburger icon in the top left corner) to access all modules, view your trial status, and manage your profile.
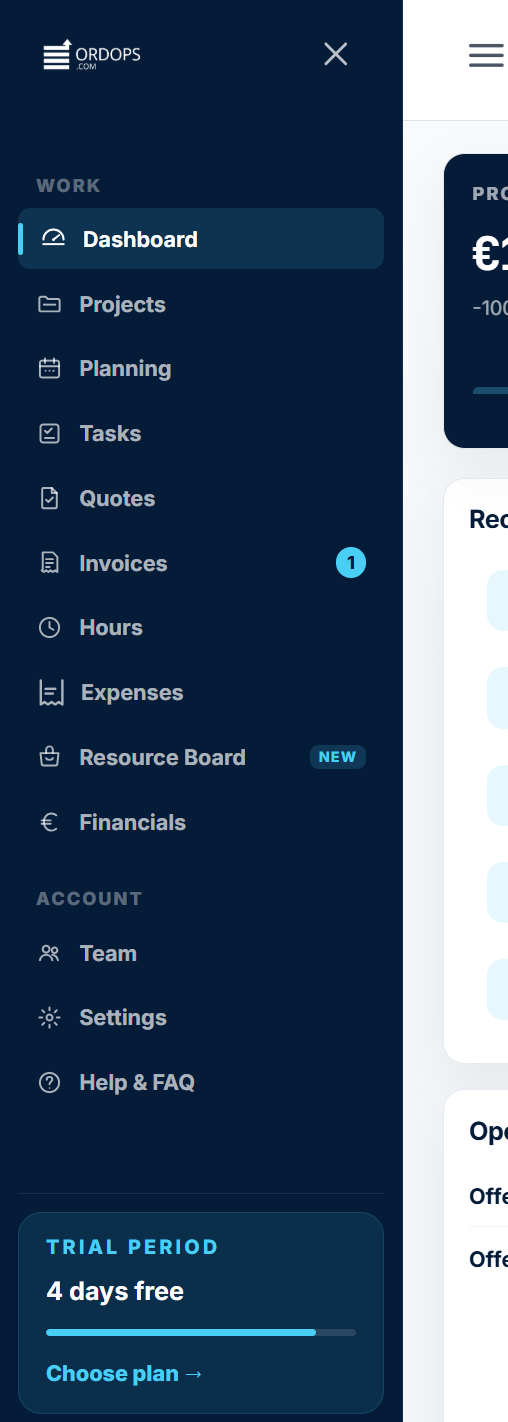
From the side menu, you can access work-related modules such as:
- Dashboard
- Projects
- Planning
- Tasks
- Quotes
- Invoices
- Hours
- Expenses
- Resource Board
- Financials
You can also access account-related sections including:
- Team
- Settings
- FAQ
In addition, the floating + button provides quick access to the most frequently used actions in the app, such as creating a project, quote, invoice, task, or expense.
This gives you quick access to all core features from anywhere in the app.
What is in the bottom navigation bar?
On mobile, the bottom bar opens Dashboard, Projects, Quotes, Calendar, and Hours. Other modules are in the side menu; the floating + button opens Quick Create.
Where can I see my remaining trial time?
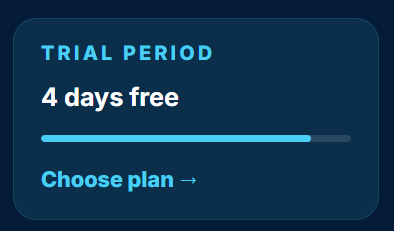
Open the side menu and scroll to the bottom.
There you will find your trial banner, showing the number of days remaining in your trial period. You can also select Choose Plan to upgrade your subscription at any time.
Below the trial banner, you will see your account information, including your name and email address.
Calendar & hours
Can I share my project planning with the customer?
Yes. Share the project planning to give the customer a read-only view of relevant dates, tasks, and milestones. Customers cannot change your planning.
How do I view my schedule?
Open Calendar to see scheduled tasks by date and team member. A task appears after it has a date or period; open it to reach the linked project.
How do I track time?
Open Hours and select the project you are working on. You can also link your time entry to a specific task if needed.
To track work in real time, press Start Timer. When you finish, stop the timer and your hours will be recorded automatically. You can review your entries in the Recent Hours section.
If you need to account for a break, open the time entry and add the break duration in minutes.
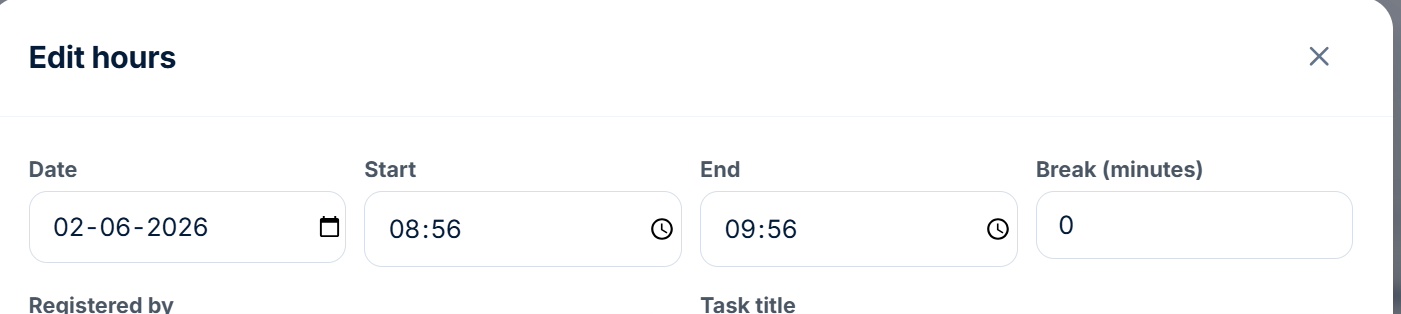
To log work you have already completed, select Add Manually and enter the date, start time, and end time.
Your total logged hours for today are displayed at the top of the page.
Can I clock in straight from the + button?
Yes. Tap the floating + button and select Clock In.
This will take you directly to the Hours page, where you can start the timer, select a project and task, or manually log time.
Quick create
What can I create from the + button?
The floating + button opens Quick Create. Depending on access, you can create a project, quote, invoice, task, or expense, or start time registration. Complete the required fields and save.
How do I open and close the Quick Create menu?
Tap the blue + button in the bottom right corner of the screen to open the Quick Create menu.
To close the menu, tap the X button in the top right corner of the panel, or simply tap anywhere outside the menu.
I tapped the + button but nothing was created. Is that a bug?
No. The + button only opens the Quick Create menu. It does not create or save anything by itself.
After opening the menu, select the action you want to perform, such as New Project, New Task, New Quote, or New Invoice. A form will then open where you can enter the required information.
Nothing is created or saved until you complete the form and select Save.
Projects
How do I complete and document a project inspection?
Open the project and select Inspection. Start a Partial inspection or Final inspection, then build the checklist from quote lines, headings, a template, or an empty list.
Review every point and mark it Approved or Defect. For each defect, record the problem, responsible person, due date, and photos. When all points are complete, the customer can sign on the device or approve by email.
After completion, Ordops creates a locked inspection report. Repairs are recorded as follow-up entries, so the original report and signature remain unchanged.
How do I create and sign a work report?
Open a project and select Work reports, then choose New. Add the people and hours, completed work, materials, and any delays or notes. Save it as a draft or ask the customer to sign.
The customer can sign on the device or receive a review link by email. Signed reports remain linked to the project. If you work offline, changes stay on the device and synchronize when the connection returns.
How do I add and manage files in a project?
Open the project and select Files. Choose Add files or Choose file to upload drawings, photos, PDFs, and other documents that belong to the job.
Files stay linked to that project, so office and field teams can find the same documents in one place. Use clear filenames and confirm that you are uploading to the correct project.
How do I create a new project?
Projects are the foundation of your work in Ordops. Tasks, hours, quotes, invoices, and expenses can all be linked to a project.
To create a project:
- Tap the floating + button and select New Project, or open Projects and select New Project.
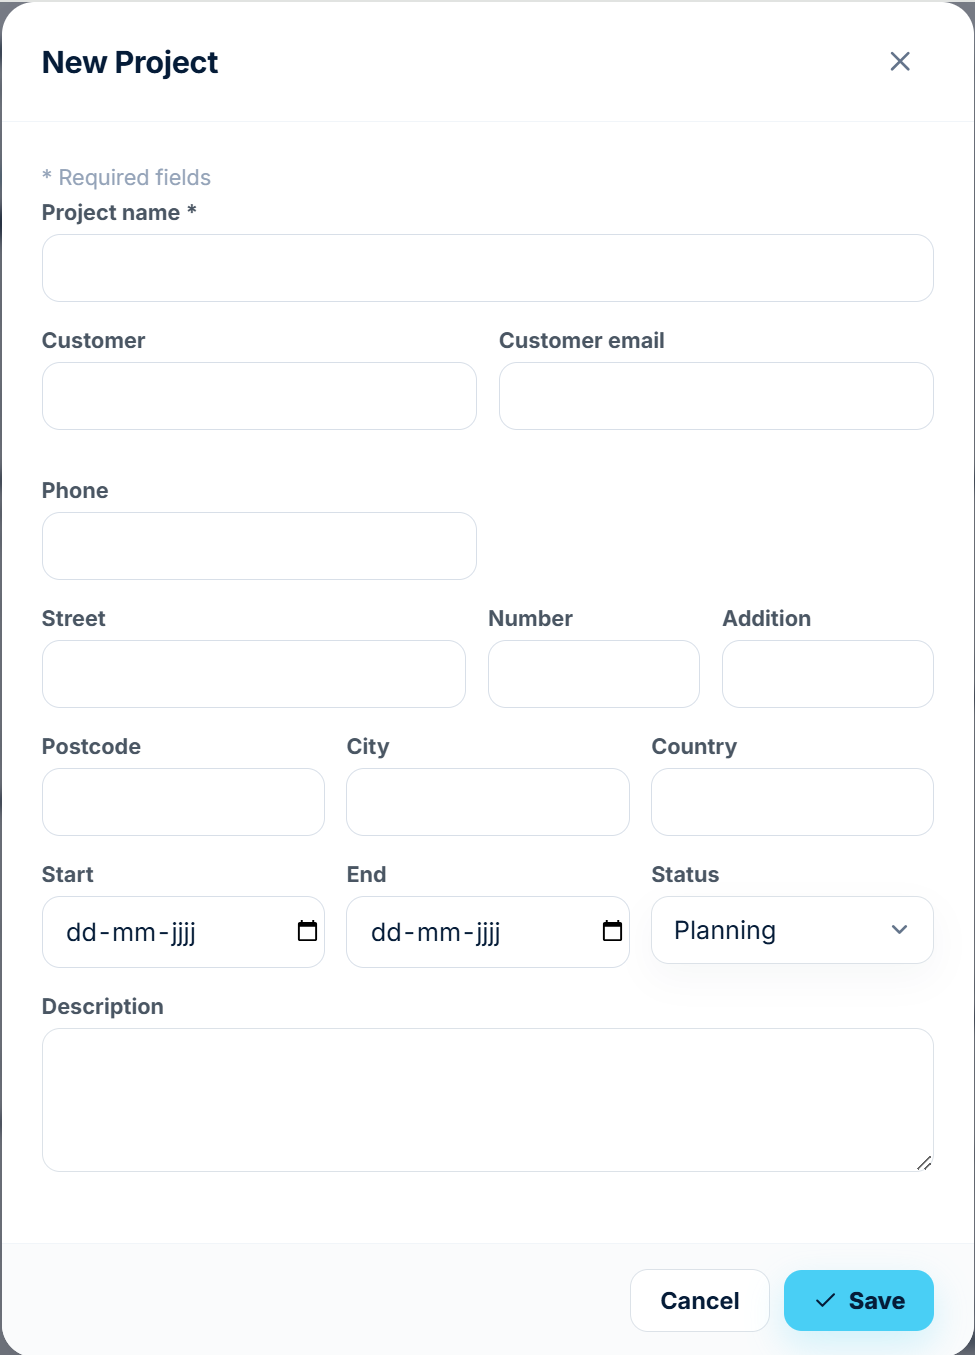
- Enter a Project Name (required).
- Optionally add customer details, including:
- Customer name
- Email address
- Phone number
- Address
- Start and end dates
- Project status
- Select Save.
A "Saved!" confirmation message will appear once the project has been created successfully.
- Only the Project Name field is required. All other information can be added later.
What statuses can a project have?
Projects use statuses such as Draft, Offered, Planning, In progress, and Completed. Use In progress once work starts and Completed after the work and handover are finished.
What does the project detail page show?
The project page combines customer details, planning, tasks, quotes, invoices, costs, hours, files, work reports, and inspections. Its financial card may show an operational estimate from the valid quote and costs so far.
How do I edit a project?
Open the project from the Projects list and tap Edit at the top of the project details page.
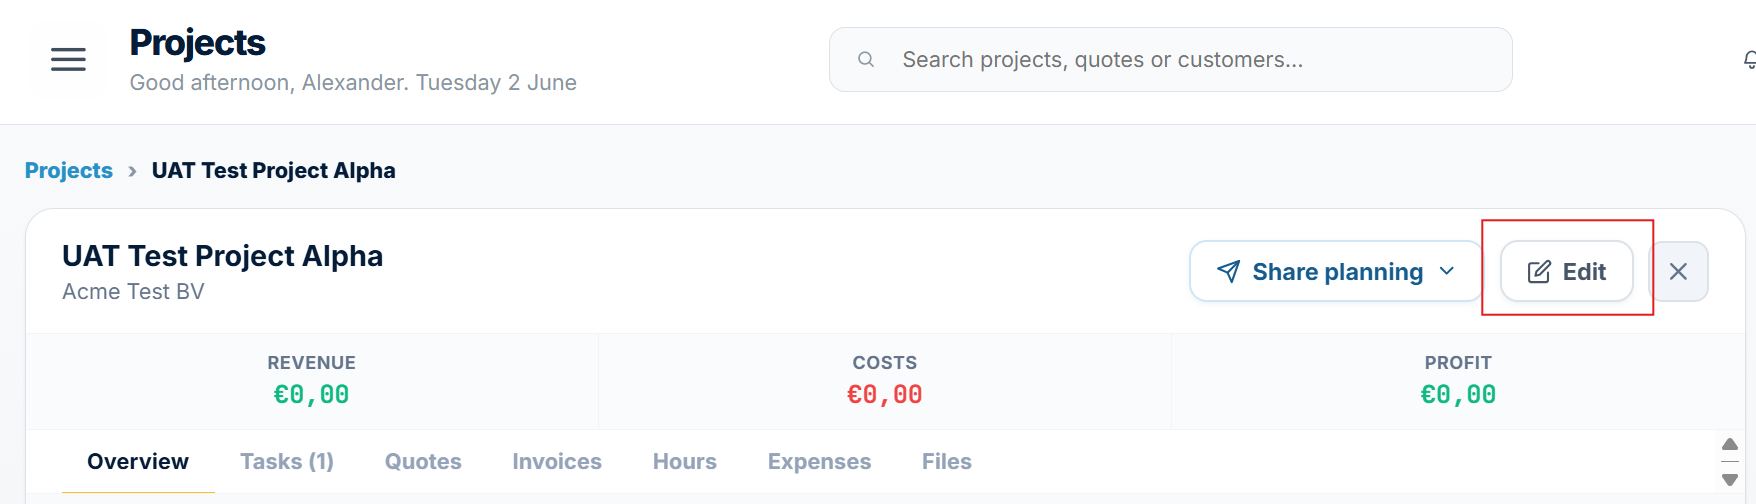 You can update the project name, customer information, contact details, dates, status, and other project settings.
After making your changes, select Save to update the project.
Resource Board
How does the Jobs marketplace work?
The Resource Board connects businesses posting work with contractors seeking suitable jobs. Set trade, region, and rate preferences; job cards show timing, budget, people needed, and responses without exposing private details too early.
How do I post my own job?
Create or edit a task and enable Publish this task on the Resource Board. Enter people needed, budget basis, dates, trade, and a clear public description, then review the preview.
What information is on a job card?
Location, estimated hours, day rate, number of people needed, and how many contractors have reacted. Tap Edit to edit your own posting.
Suppliers
What is the Purchasing module?
Purchasing keeps supplier catalogues and purchase-price history together. Compare current and previous prices, spot increases, filter products, and select supplier items for quotes.
How do I add a new supplier?
In Purchasing, choose + Supplier, enter the company details, and save one supplier record per company. Then add or import its products and prices.
How does the price-list import work?
Open a supplier and import a CSV price list. Review product names, SKUs, categories, units, and prices before confirming. Ordops keeps older prices for comparison; save Excel files as CSV first.
What does the Δ% column mean?
That's the percentage difference between the current price and the last year price. Green/black is a normal increase, red with an orange exclamation mark means an increase above your set threshold (default >10%).
How do I set the price increase warning?
In the top right, next to the search bar, there's a ⚠ > 10% field. Adjust this percentage to determine from what increase a product gets flagged.
Can I adjust the default markup?
Yes. Change the default markup in Purchasing and Ordops recalculates suggested customer prices. You can still override the markup per product.
How do I filter by category or supplier?
Use the All categories dropdown, or click a supplier in the left-hand column to see only their products. The search bar works on name, SKU, and supplier at the same time.
Can I use supplier prices in quotes?
Supplier prices are suggestions and are not inserted into every quote automatically. Select the needed items and review description, quantity, purchase price, markup, and customer price.
Tasks & team
How do I create a task and assign it to a team member?
Create a task from Quick Create, Tasks, Calendar, or a project. Choose its project, schedule, and one or more team members; Ordops checks availability and shows it in all linked views.
Can I assign more than one person to a task?
Yes. The team member selector supports multiple selections.
Each selected team member is added as a separate chip, and the selector displays the number of assigned people, for example Add Team Members (1).
You can continue selecting additional team members until everyone required for the task has been assigned.
How does the availability check work?
Once you set a date and time for a task, Ordops automatically checks the availability of the selected team members.
Each person will be shown as:
- Available – No scheduling conflicts were found.
- Busy – The person already has work planned during the selected time period.
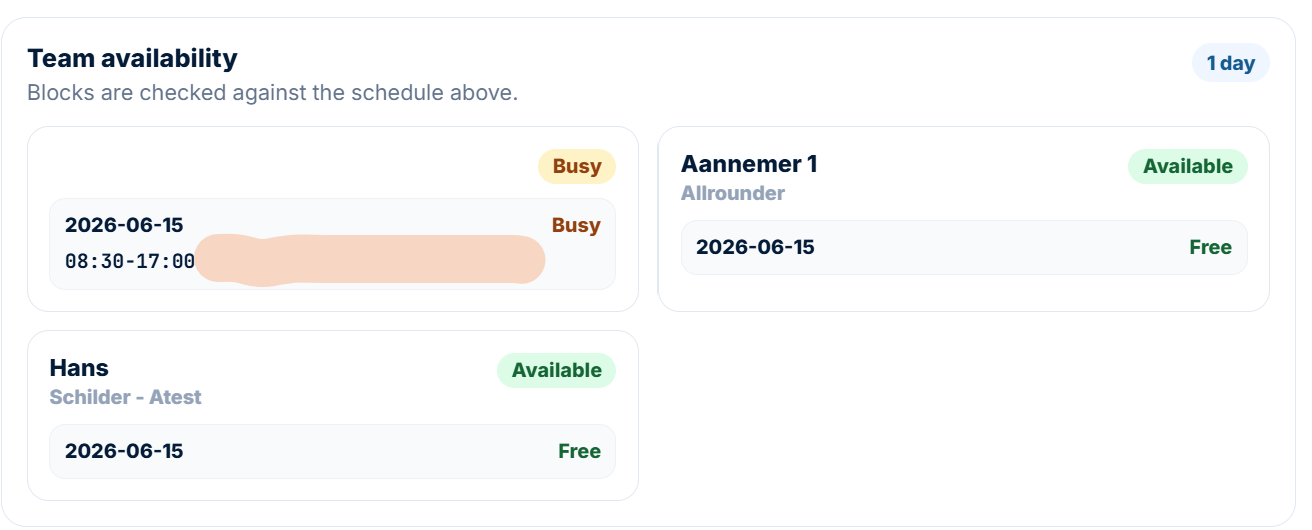
When a conflict exists, the overlapping schedule entry is displayed so you can see what is causing the clash.
Availability is calculated based on the date and time entered in the task schedule, helping you avoid double-booking team members.
What task-planning options are available?
Tasks support a single session, date range, separate custom sessions, and recurring schedules. Set dates, times, workdays, and duration; Ordops calculates planned hours across sessions.
Where do assigned tasks appear afterwards?
Once a task has been created and assigned, it appears in three places:
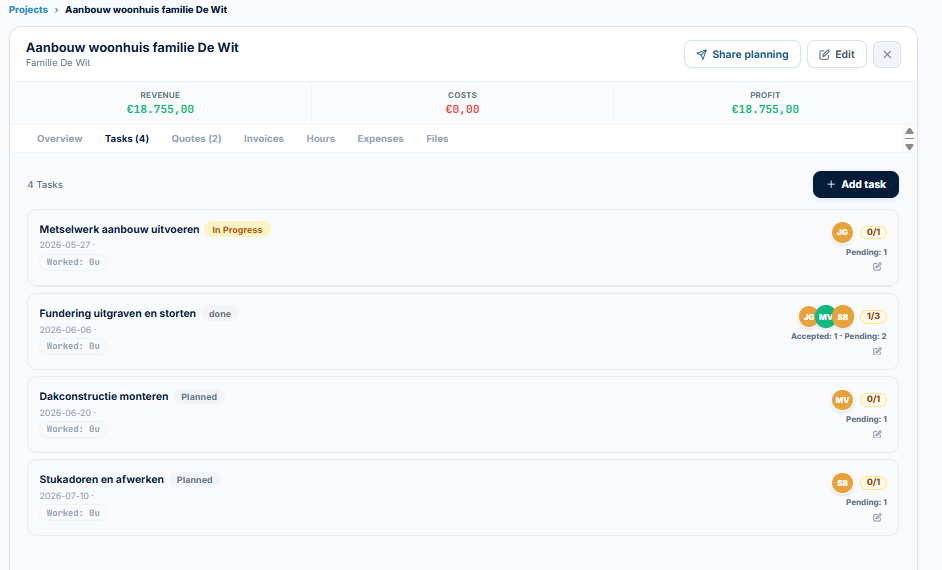
Project Tasks Tab
Open the related project and navigate to the Tasks tab. Here you can view task status, assigned team members, schedule, planned hours, and worked hours.
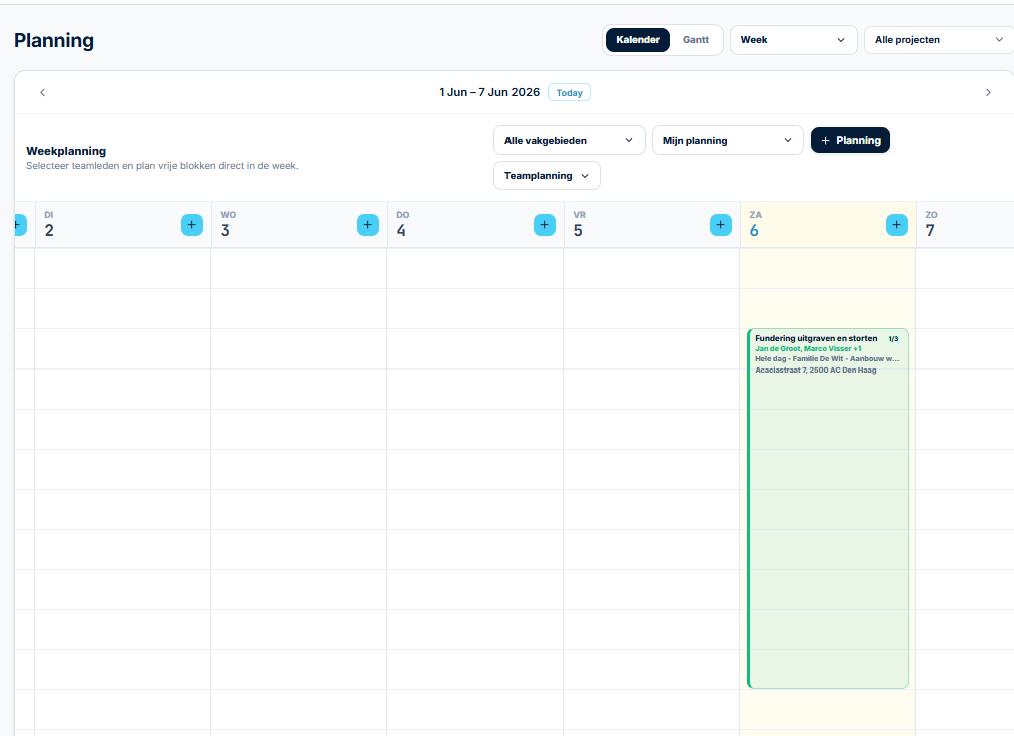
Planning
The task is added to the assigned team member's schedule and appears in Planning, helping you manage workloads and availability.
Tasks Module
The task also appears in the Tasks module, where you can view all tasks you have created or that have been assigned to you.

In all modules you can immediately see key information such as:
- Number of assigned team members
- Number of accepted assignments
- Scheduled date and time
- Task status
Clicking on a task opens the detailed task view, where you can see the full description, assigned team members, schedule, hours, status, notes, and other task-related information.
Troubleshooting
Why can I not save what I am creating?
Make sure all required fields marked with * have been completed.
For example:
- A project requires a project name.
- A task requires a project to be selected.
- Other forms may have additional mandatory fields.
Once all required information has been entered, select Save to create the item.
Why does the Save button not work?
Check that all required fields marked with * are completed. Scroll through the form to make sure nothing is missing.
Then tap Save once and wait for the "Saved!" confirmation message.
Why is a team member marked as Busy?
A Busy status means the selected team member already has work scheduled during the chosen date or time.
The availability check automatically warns you about scheduling conflicts to help avoid double bookings.
To continue, either:
- Select a different date or time, or
- Assign the work to a team member who is shown as Available.
You can also review the team member's schedule in Planning to see their existing assignments.
Why can I not find my new project or task?
First, confirm that you received the "Saved!" confirmation message after creating the project or task. If no confirmation appeared, the item may not have been saved.
For projects, check the Status filter on the Projects page and set it to All. Then refresh the list.
For tasks, open the related project and navigate to the Tasks tab, or review the Tasks module to find the newly created task.